How To Make A Lattice Pie Crust
Learn how to make a lattice pie crust with this easy step-by-step tutorial. This simple technique is a beautiful decorative touch for almost any pie!

The thought of trying to weave a lattice topping on a pie used to seem so intimidating to me. It wasn’t until I actually tried it myself a few times that I realized it’s actually not very difficult at all.
After some trial and error, I found a technique that makes weaving a lattice pie crust topping extremely easy and it only takes a few minutes. If you can roll out some dough, cut it into strips, and follow a few simple steps, then you can easily throw this together.
With Thanksgiving right around the corner, this is also a perfect way to add a beautiful touch to your pie without much effort. Everyone will think it took a lot of work, but the fact that it’s actually really easy can be our little secret.

To make this topping, you’ll start out with some pie crust dough. If you want to keep this a little easier, then you can use store-bought pie crusts. Or if you’re feeling a little more adventurous then you can make your own pie crust. I have a full step-by-step tutorial here for how to make pie crust and it’s simple too.
To start, you’ll roll out the dough and cut it into strips. I find that about 3/4-inch wide strips are perfect and you’ll also want to cut out 10 strips. You can cut the strips a little bit thicker, but keep in mind that this may not work as well if you cut them too thick.
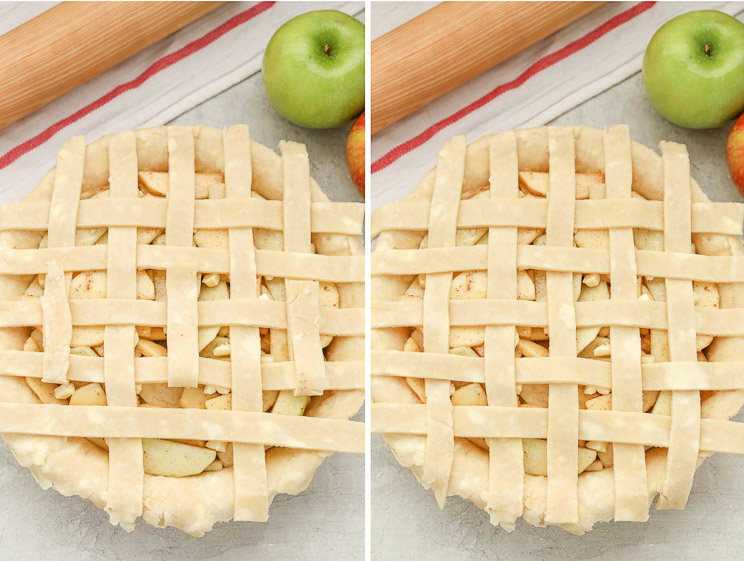
You’ll place five of the strips vertically on top of the pie like in the picture on the left. Then, think of these five strips as numbers – 1, 2, 3, 4, and 5. Lift up strips 1, 3, and 5 and then place another strip horizontally across the middle of the pie like the top right picture above. I like to start in the middle because it helps to make sure that the strips are evenly spaced.

Then, you can either start adding strips to the top or bottom. For this tutorial, I just started with the top. You’ll place strips 1, 3, and 5 back down. Then, lift up strips 2 and 4 and place down another strip of dough horizontally.
Once you’ve done that, place strips 2 and 4 back down and then lift 1, 3, and 5 back up and add one more piece of dough horizontally towards the tops of the pie. Then, fold them back down.

Once you’ve completed the top of the pie, you’ll just repeat the same process again with the bottom portion.
Lift strips 2 and 4 back up, place another piece horizontally under the middle strip. Then, place them back down.

And finally, you’ll lift strips 1, 3, and 5 back up and place down your final strip of dough. Then lay them back down.

The final step is to just cut off any excess dough and then decorate the edges of your pie crust. For this pie crust, I used my index finger to flute the edges. Sometimes I’ll just trim off the dough and use a fork to decorate the edges and to help press the lattice topping into the edges of the pie crust.
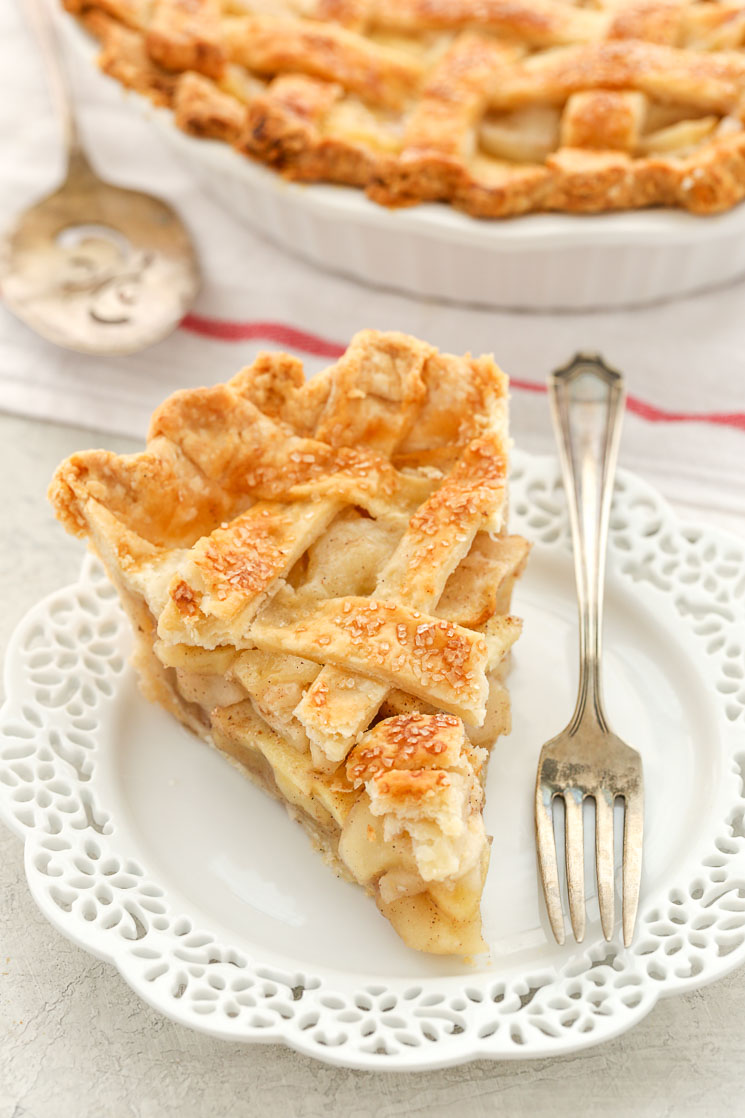
For this pie, I also brushed an egg wash on top and sprinkled it with a little coarse sugar.

Speaking of that pie, I’ll be sharing this delicious apple pie recipe with you on Friday. Just so you have an excuse to practice making a lattice pie crust.


I was asked to make a cherry pie for a party a friend is having next weekend and I have never made one before, would I be able to put this on top? Thank you. I really appreciate the tutorial. It is so easy to understand!
Yes, this would work great on a cherry pie!
Thank you for the quick reply, I really appreciate it!
I wanted to share with you how it turned out! As I mentioned earlier, it was for my sisters Friendsgiving day party so I wanted to make it special so I added the leaves around the edge and a cherry in the center. I think the lattice looks great too! Everyone was commenting on it when they saw it. I thought you could see the detail better before it was baked. Which is why it’s not baked in this fist pic.
https://photos.shutterfly.com/gallery/775754ef-0a8d-41cd-bddf-b0722d9b3ce4?type=shared&cid
https://photos.shutterfly.com/gallery/7bef873b-7357-4a44-b486-68ba9863cb7a?type=shared&cid
This other photo is just the pumpkin pie next to the cherry. I used fondant cutters to write it on there with extra pie dough. Thank you again for the tutorial.
That looks beautiful, Holly! I love the decorations around the pie edges too. So glad you found the tutorial helpful 🙂